# Going Solar: A Step-by-Step Guide to Installing Solar Panels
There’s nothing quite like waking up to the gentle warmth of the sun streaming through the windows, knowing that your energy comes from the very light that brightens your life. When I made the leap to solar power, the excitement of harnessing the sun’s energy paired perfectly with the thrill of independence. Installing solar panels transformed my home into a self-sufficient energy oasis, and I can’t wait to share how you can embark on your own solar journey! From start to finish, this guide will walk you through the process, sprinkle in some pro tips, and show you how to harness the power of the sun—without any of the headaches.
### Why Choose Solar?
Before diving into the nitty-gritty, let’s chat about why going solar is a fantastic choice. The benefits are endless:
1. **Financial Savings:** Lower or eliminate electricity bills.
2. **Environmental Impact:** Reduce your carbon footprint.
3. **Energy Independence:** Be less reliant on the grid, especially during outages or peak hours.
4. **Property Value Increase:** Solar panels can boost your home’s market value.
### Step 1: Assess Your Energy Needs
The first step is understanding your energy consumption. Gather your electricity bills from the past year to get an average monthly usage. This will help you determine how many solar panels you’ll need.
**Pro Tip:** Consider your future energy needs! If you plan to add electric vehicles, additional appliances, or anything that may consume more energy, factor this into your calculations.
### Step 2: Evaluate Your Roof and Location
Not all roofs are created equal! Here are some things to check:
– **Orientation:** Ideally, your roof should face south to maximize sun exposure.
– **Angle:** A roof with a 30-degree angle is optimal for solar panels.
– **Shade:** Trees, buildings, or obstructions can reduce efficiency. Conduct a shade analysis at different times of the day.
**Pro Tip:** If your roof isn’t suitable, ground-mounted solar panels are a great alternative! They can be positioned to catch maximum sunlight.
### Step 3: Research Local Regulations and Incentives
Before purchasing panels, familiarize yourself with local building codes, zoning laws, and HOA regulations. Additionally, investigate incentives such as tax credits or rebates available in your area.
**Pro Tip:** Visit the Database of State Incentives for Renewables & Efficiency (DSIRE) for up-to-date information on available incentives.
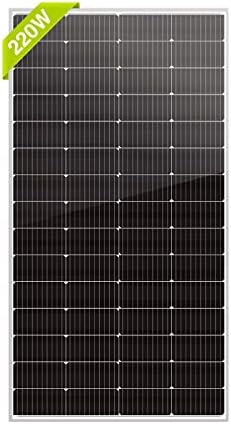
### Step 4: Choose the Right Solar Panels
You’ll find various types of solar panels such as monocrystalline, polycrystalline, and thin-film. Here’s a quick rundown:
– **Monocrystalline:** Highly efficient and space-saving but pricier.
– **Polycrystalline:** More affordable but slightly larger and less efficient.
– **Thin-Film:** Flexible and lightweight, ideal for specific applications, but generally less efficient.
**Pro Tip:** Look for panels with a good warranty (at least 25 years) to ensure longevity.
### Step 5: Decide Between DIY and Professional Installation
Installing solar panels can be a DIY project if you’re handy and understand electrical work, but hiring professionals ensures safety and efficiency. A professional installation can also guarantee the best panel placement and structural integrity.
**Pro Tip:** If you opt for a professional, get multiple quotes to compare services and prices!
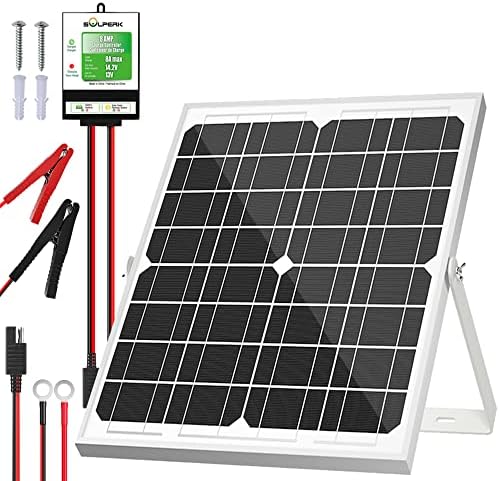
### Step 6: Purchase Your Solar Panels
Once you’ve decided on your panels and installation method, it’s time to place your order. Here are some helpful tips for purchasing:
– **Look for reputable suppliers:** Check reviews and ratings.
– **Consider warranties and insurance policies:** Protect your investment!
### Step 7: Installation Time
If you’re going the DIY route:
#### **Gather Tools and Materials:**
– Mounting hardware
– Inverter (converts solar energy into usable AC power)
– Wiring and connectors
– Safety gear
#### **Installation Steps:**
1. **Prepare the Mounting Surface:** Ensure your roof is clean and structurally sound.
2. **Install the Mounting System:** Follow the manufacturer’s instructions carefully.
3. **Attach Solar Panels:** Carefully secure panels to mounts.
4. **Connect the Inverter:** This may require professional help if you’re unfamiliar with electrical systems.
5. **Wire it Up:** Connect everything according to the schematic provided with the panels.
If you hired professionals, they’ll handle everything and ensure the system is operational.
### Step 8: Inspections and Interconnections
Once installed, most local governments require an inspection to ensure everything is up to code. After passing the inspection, contact your utility company to connect your solar system to the grid. This connection allows for net metering, meaning you’ll receive credits for any excess power you generate.
### Step 9: Monitor and Maintain Your Solar System
After installation, monitoring your solar panel performance is crucial for ensuring maximum efficiency. Many systems come with apps that allow real-time performance tracking.
**Pro Tip:** Perform regular maintenance by cleaning panels, checking for debris, and ensuring all connections are secure. This can enhance performance and longevity.
### Step 10: Enjoy Your Renewable Energy!
Congratulations! You’re now part of a global movement towards renewable energy. Sit back, relax, and enjoy lower energy bills, a smaller carbon footprint, and peace of mind knowing you’re harnessing nature’s power.
—
### Final Thoughts
Going solar is an empowering journey, one that rewards you financially while aligning with a sustainable future. Each step can bring challenges, but the satisfaction of watching your energy meter slow down and knowing you’re helping the planet is worth every effort.
Remember, the path to solar energy is about more than just panels on a roof; it’s a lifestyle choice that celebrates the sun’s potential while liberating you from traditional energy systems.
Enjoy the sunshine!
### Pro Tips Recap
1. Assess future energy needs when calculating usage.
2. Consider ground-mounted systems if roofs aren’t suitable.
3. Research local incentives for financial benefits.
4. Compare professional installation quotes for the best value.
5. Regular maintenance is key for optimal performance.
So, are you ready to take that leap to solar power? Adventure awaits as you embrace clean, renewable energy!